
Delicious Coxinha:
A Brazilian Favorite Street Food
(chicken croquettes)

Craving a savory Brazilian snack that’s crispy, creamy, and full of flavor? Look no further than coxinha, one of Brazil’s most beloved street foods. Traditionally filled with seasoned shredded chicken and shaped like a teardrop, coxinha is deep-fried to golden perfection and makes the ultimate comfort food.
In this version, we’re sticking with the classic shredded chicken filling, but adding a generous touch of Catupiry—a smooth and creamy Brazilian cheese that takes the flavor and texture to the next level. The result is a rich, indulgent interior wrapped in a golden, crispy shell.
Can’t find Catupiry? No problem—cream cheese makes a great substitute. It offers a similar creamy consistency and mild flavor that blends beautifully with the seasoned chicken.
Whether you’re already a fan of Brazilian cuisine or trying coxinha for the first time, this version with creamy chicken and cheese is sure to impress. It’s perfect for parties, afternoon snacks, or just when you're in the mood for something deliciously savory.
Let’s walk through how to make coxinha with shredded creamy chicken and Catupiry (or cream cheese) from scratch.
Key Ingredients and Flavors in Coxinha
Coxinha is known for its rich, satisfying taste and crispy texture. Here’s what gives it its signature flavor:
-
Shredded Chicken: The star of the filling—seasoned with garlic, onion, herbs, and sometimes a dash of hot sauce for extra depth.
-
Catupiry (or Cream Cheese): Adds creaminess and a mild tang that balances the savory chicken.
-
Dough: Made from a mix of flour and chicken broth, the dough is soft, pliable, and easy to shape—ideal for holding the creamy filling.
-
Breadcrumb Coating: A light breadcrumb coating gives coxinha its golden, crispy crust after frying.
-
Seasonings: A mix of garlic, onion, parsley, and sometimes paprika or black pepper makes each bite flavorful and well-balanced.
Together, these ingredients create a snack that’s crispy on the outside, creamy and savory on the inside—a true staple of Brazilian comfort food.
Instructions:
Step 1: Prepare the Dough
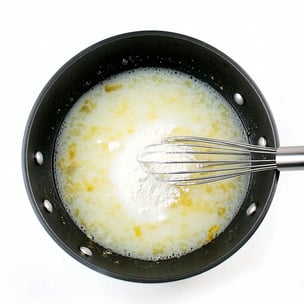
1. In a medium-sized pot, combine the chicken broth and butter. Heat until the butter melts. 
2. Gradually add the flour, stirring constantly to avoid lumps. Once fully combined, continue stirring until the dough begins to pull away from the sides of the pot. This may take about 5-7 minutes.
3. Transfer the dough to a clean surface, and let it cool slightly. Once it’s cool enough to handle, knead it a little to ensure it’s smooth and well-combined.

Step 2: Make the Filling
1. Cook the Chicken: Place the chicken breasts in a pressure cooker and pour in enough chicken broth (or water) to fully cover them. Seal and cook for 40–45 minutes until tender.

2. Shred the Chicken: Remove the cooked chicken from the pot and shred it using your preferred method (two forks, a stand mixer, or by hand). Reserve the broth—you’ll use it for both the filling and the dough.

3. Sauté the Vegetables: In a frying pan, heat the olive oil over medium heat. Add the diced onion and tomato. Cook for 5–6 minutes until softened and fragrant.

4. Combine with Chicken: Stir in the shredded chicken and a ladle or two of the reserved broth to keep the mixture juicy.
.png?width=302&height=201&name=0ba31b0a-7699-4769-93c0-d13c4f372137%20(1).png)
5. Add Tomato Purée: Mix in just a tablespoon of tomato purée, enough to slightly thicken the filling and give it a creamy, cohesive texture.
6. Season and Finish: Add salt and black pepper to taste, then stir in the chopped parsley. Remove from heat and allow to cool slightly.

Step 3: Assemble the Coxinha
1. Portion the Dough: Take a small piece of dough—about the size of a golf ball—and roll it into a ball. Flatten it into a disc using the palm of your hand, about ¼ inch thick.

2. Add the Cheese Layer: Place a small spoonful of Catupiry cheese (or cream cheese) in the center of the dough. This adds an extra layer of creaminess and helps balance the savory chicken.

3. Add the Filling: Spoon a generous portion of the shredded chicken mixture on top of the cheese.

4. Shape the coxinha: Carefully fold the edges of the dough up and around the filling, pinching to seal the top. Gently shape it into a teardrop shape.
5. Seal Well: Make sure the filling is fully enclosed and the dough is sealed to prevent it from opening during frying.

Step 4: Coat and Fry
1. Prepare the Coating: In a shallow bowl, beat the eggs. In a separate bowl, pour the breadcrumbs.

2. Coat the Coxinhas: One at a time, dip each shaped coxinha into the beaten egg, making sure it’s fully coated. Then roll it in the breadcrumbs, pressing gently to ensure an even, crispy layer.

3. Heat the Oil: In a deep pan or fryer, heat vegetable oil to 350°F (175°C).
4. Fry in Batches: Carefully place a few coxinhas in the hot oil, making sure not to overcrowd the pan. Fry for 4–5 minutes, turning occasionally, until golden brown and crispy on all sides.

5. Drain Excess Oil: Use a slotted spoon to transfer the fried coxinhas to a plate lined with paper towels. Let them rest for a few minutes before serving.
Step 5: Serve and Enjoy
Serve and Enjoy: Serve your coxinhas warm with a side of hot sauce or your favorite dipping sauce. Enjoy the crispy exterior, the gooey catupiry cheese, and the savory chicken filling—a perfect bite every time!
Why You’ll Love Coxinha
Coxinha is the ultimate Brazilian comfort snack—crispy on the outside, creamy and savory on the inside. The combination of seasoned shredded chicken and melty cheese wrapped in golden, fried dough is simply irresistible. Whether you're hosting a party, looking for a fun cooking project, or just craving a flavorful bite, coxinha is a crowd-pleaser that never disappoints. Once you try it, you’ll understand why it’s one of Brazil’s most beloved street foods!
Have you tried making coxinha? Share your experience in the comments below!


